Thursday, January 29, 2009

My quilt


So I just wanted to share with you my quilting progress ! I'm making this quilt out of hand dyed fabric that I've done. Each of the colors on the strips are different , they each have a different color code. You might not believe this in the picture but when you see it in person you can tell there is a difference. I'm going to place black in between each row of color. I still have many rows to do left by the way. Also I'm going to give it a black boarder around it. It will end up having like three borders to give it some size, but the colors are all i'm worried about about. I can't wait to finish it ! For now i'm hanging up the rows to see how the look.


I also wanted to show you my workspace along with my room mate's works space. This is what should be the dining room, but we wanted the room to be something we would use since we eat all of our meals on the couch anyways.

garlic and cheese soup


So I had a ton of garlic in the house and I really needed something to do with it. I found this at smittenkitchen.com and I was well wondering how it was going to taste. You might think that 30 some garlic cloves is a bit much in a soup, but it isn't. This soup turned out really really good ! And garlic is super good for your body. One problem, don't plan on kissing your hunny after this since the main parts of the soup are not only garlic but also onion as well. It will make your mouth all garlic for the rest of the day.


Taken from smittenkitchen
Roasted Garlic Soup with Parmesan Cheese

26 garlic cloves (unpeeled)
2 tablespoons olive oil
2 tablespoons (1/4 stick) butter
2 1/4 cups sliced onions
1 1/2 teaspoons chopped fresh thyme
18 garlic cloves, peeled
3 1/2 cups chicken stock or canned low-salt chicken broth
1/2 cup whipping cream
1/2 cup finely grated Parmesan cheese (about 2 ounces)
4 lemon wedges

Preheat oven to 350°F. Place 26 garlic cloves in small glass baking dish. Add 2 tablespoons olive oil and sprinkle with salt and pepper; toss to coat. Cover baking dish tightly with foil and bake until garlic is golden brown and tender, about 45 minutes. Cool. Squeeze garlic between fingertips to release cloves. Transfer cloves to small bowl.

Melt butter in heavy large saucepan over medium-high heat. Add onions and thyme and cook until onions are translucent, about 6 minutes. Add roasted garlic and 18 raw garlic cloves and cook 3 minutes. Add chicken stock; cover and simmer until garlic is very tender, about 20 minutes. Working in batches, purae soup in blender until smooth. Return soup to saucepan; add cream and bring to simmer. Season with salt and pepper. (Can be prepared 1 day ahead. Cover and refrigerate. Rewarm over medium heat, stirring occasionally.)
Divide grated cheese among 4 bowls and ladle soup over. Squeeze juice of 1 lemon wedge into each bowl and serve.

Serves 4.

Sunday, January 25, 2009

Pasta from party

Sadly I do not have image for this , as it was for a fun party with my fellow graphic students . However it did receive thumbs up all around so I'm going to at least share the recipe for you to try. Its adapted from Rachael ray. I always like adding my own things into the pot.

Vodka Cream Pasta

This makes a good amount for two people ...so plan wisely
Ingredients
  • 1 tablespoon extra-virgin olive oil, once around the pan in a slow stream
  • 1 tablespoon butter
  • 2 cloves garlic, minced
  • 2 shallots, minced
  • 1 cup vodka
  • 1 cup chicken stock
  • 1 can crushed tomatoes (32 ounces)
  • Coarse salt and pepper
  • 16 ounces pasta, such as penne rigate
  • 1/2 cup heavy cream
  • 20 leaves fresh basil, shredded or torn
  • Parm Cheese, shaker
Preparation

Heat a large skillet over moderate heat. Add oil, butter, garlic, and shallots. Gently saute shallots for 3 to 5 minutes to develop their sweetness. Add vodka to the pan, 3 turns around the pan in a steady stream will equal about 1 cup. Reduce vodka by half, this will take 2 or 3 minutes. Add chicken stock, tomatoes. Bring sauce to a bubble and reduce heat to simmer. Season with salt and pepper.

While sauce simmers, cook pasta in salted boiling water until cooked to al dente (with a bite to it). While pasta cooks, prepare your salad or other side dishes.

Stir cream into sauce. When sauce returns to a bubble, remove it from heat. Drain pasta. Toss hot pasta with sauce and basil leaves as well as cheese. Let it sit for a bit, as it might seem to be runny, it will thicken up I promise ! Pass pasta with crusty bread.


I have to make sure to make this again and take a picture.

Maybe I'll just take a picture of the book ....

Monday, January 19, 2009

Images explained

Ok you might be wondering what is up with the images ? Well I wanted to post after the images but then I forgot, oops. Alright well the first one is from smallville. I took the images myself from my computer, which you can tell. I loved this scene so much that I had to have it. Its the scene where Clarks father has just died and they are all at the grave site. Snow is falling, people are looking worried, sad, and tired. I just love it. This was also the 100th episode.

The other one is from the internet. I stumbled on it and it struck me to be really amazing. I have been really toying with the idea of abandonment a lot lately. It might because I've been playing fallout 3 hardcore, where a lot of things in the game have been abandon. I would love to bring this idea into my art work, but i don't really know how I would do that. Not that this image series has anything to do with nuclear fallout but it reminds me of it, so much so its reminds me a lot of the Pripiat images that you see. If you don't know what Pripiat is, its an entire abandon city in Russia / Ukraine, from the Chernobyl explosion in 1986. I think I'm going to find some images now and post them ! stay tuned.

Monday, January 12, 2009

Ginger Bread House


This here is a ginger bread house that I built over the Holidays. It took me over about 6 hours each day for 3 days to make it. Its my real first one, I don't count the ones that were pre-made in a box and you don't have to do any of the work other then making it looking pretty. Now it from the gingerbread architect book that I found at Barns and Noble. As you can see I tired to make the one that was on the cover .

Now I wouldn't tell you to make these in three days, no no. It tells you in the book to leave yourself at least a week to make them or there will be a lot of stress to come, and its true. I needed to get this out soon because x-mas was ...well the next day. I made the base of it out of wood and placed a light in it so that it whole thing would lit.

What I love the most about this house is the fact that it has real " glass" windows, made from crushed butterscotch hard candies. You crush them and put them in while your gingerbread is baking when its about 80% cooked. Sometimes I pulled it out and it had holes so I just fill in and popped back in. It didn't do anything to the gingerbread because it wasn't hot enough , long enough, for the bread but it was for the candy. It was a little annoying, why, because of these windows I needed to watch and do each piece one by one. It was about 30 or some pieces. Needless to say I was up till about 3am watching x-mas movies. I have to say at 3am , watching white Christmas really makes you cry :D.


Anyways, it was a lot of fun to make this crazy house. It ended up being about 13in high and 15 in long, with about 12 in deep. Big house. We ended up punching it and drop kicking it after the holidays. I can't wait to make another !

Friday, January 9, 2009

Cirtus Yummy Peels


Alright so I had to really research this one. I went to a few different sites like here and here for way to make citrus peels, but it always seemed when making them most people had trouble with the grapefruit. After a few tries here is what I did to make the yummy holiday candies


Candied Citrus Peel
4 grapefruit rinds (or equivalent in citrus fruit of your choice)
5.5 cups sugar (divided use)2 cups water
Melted chocolate (optional)
Flavoring (lemon is great for this)


Scrape all of the flesh and membranes from the fruit rind, this is very important with the grapefruit, you don't have to do this with the oranges. Make sure to leave the pith intact. Slice the rind into half inch slices and place into a pan large enough to hold it plus an inch of water. Cover with clean water. Bring water to a boil and boil for a minute or two then drain. Repeat a total of five times until the rinds are very tender. Leave in a colander to drain well.
While the peel is draining, mix together four cups of sugar and the 2 cups of water. Bring to a boil and continue to heat until the mixture is clear. If you wish, you can drop flavorings such as cinnamon, cardamom, or vanilla into the sugar syrup to flavor the final product.

Using several layers of paper towels or a kitchen towel, press the rinds to extract as much water as is easily possible without smashing them. Once the syrup is clear, drop in the drained peel. Make sure that there is enough syrup to allow all of the rinds to be in contact with it. If there isn't make a half batch of syrup in another pot and ladle over the top.
Bring syrup and rind to a boil and reduce heat to very low. Cover and allow to simmer until the rinds become translucent and jewel like (almost like colored glass). Stir occasionally. This takes about an hour.

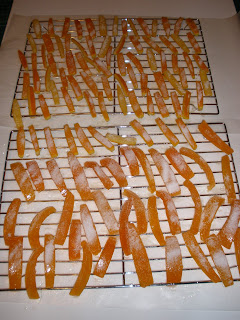
Remove the rinds to baking sheets lined with parchment and allow to dry over night. Take your reserve cup and a half of sugar and put in your food processor, whirring it until it is the consistency of fine sand. This step is not strictly necessary but creates a better finished product. Take the slightly tacky pieces of candied rind and toss them in the sugar until thoroughly covered. This step is very important here, it helps make them harder and sweeter. Shake off gently and return to the cookie sheets. Allow to dry for a further 2-4 hours before placing in an airtight container for storage.


Optionally instead of covering the rinds in sugar you can dip them in chocolate and allow to
harden.

Blueberry crumble bars !


Blueberry Crumb Bars

From AllRecipes.com

After seeing a blueberry crumb bar on another site, I immediately wanted to make them mainly because of the really yummy pictures that came with it. So I snagged a recipe from AllRecipes.com and a few yum yums later I had this. I dolled it up with some lemon juice and lemon zest, they were just as heavenly as anything else you can make. My roommate and I because addicted to these, they are great for any meal for the day ! We love to have ours with some tea. I made these about three weeks ago and now I'm ready for round two with these bad boys.

I read that it could be easily swa

pping another fruit or berry for the blueberries–I’m especially thinking something tart like cranberries in the fall (I think using orange instead of lemon with cranberries would make it even better). But if you have blueberries on hand, do not miss a chance to make these.Right now in my area they are selling blueberries two for one. They are just so yummy

These are best to cut once chilled, and store even better in the fridge than they do at room temperature because they end up getting a bit mushy after a while.


Yield: 36 smallish rectangles

1 cup white sugar
1 teaspoon baking powder
3 cups all-purpose flour
1 cup cold butter (2 sticks or 8 ounces)
1 egg
1/4 teaspoon salt
Zest and juice of one lemon
4 cups fresh blueberries
1/2 cup white sugar
4 teaspoons cornstarch

1. Preheat the oven to 375 degrees F (190 degrees C). Grease a 9×13 inch pan.

2. In a medium bowl, stir together 1 cup sugar, 3 cups flour, and baking powder. Mix in salt and lemon zest. Use a fork or pastry cutter to blend in the butter and egg. Dough will be crumbly. Pat half of dough into the prepared pan.

3. In another bowl, stir together the sugar, cornstarch and lemon juice. Gently mix in the blueberries. Sprinkle the blueberry mixture evenly over the crust. Crumble remaining dough over the berry layer.

4. Bake in preheated oven for 45 minutes, or until top is slightly brown. (This took an extra 10 to 15 minutes in my oven.) Cool completely before cutting into squares.

Enjoy !